White Chocolate Fudge: Creamy, Dreamy, and Oh-So-Easy!
Let’s talk about White Chocolate Fudge, shall we? It’s that perfect little treat that feels like a hug for your sweet tooth. Smooth, creamy, and just the right amount of sweet, this fudge is a must-have for holiday gatherings, cozy evenings, or whenever you’re craving something indulgent.
And here’s the best part—this fudge is ridiculously easy to make. No candy thermometers, no complicated techniques, just a simple, foolproof recipe that delivers every time. Whether you’re a fan of add-ins like nuts or sprinkles or prefer your fudge pure and simple, this recipe is endlessly customizable.
So grab your saucepan, and let’s whip up some deliciousness!
Why You’ll Love This Recipe
- No-Fuss Prep: Just a few ingredients and one saucepan—easy peasy!
- Customizable: Add your favorite mix-ins or keep it classic.
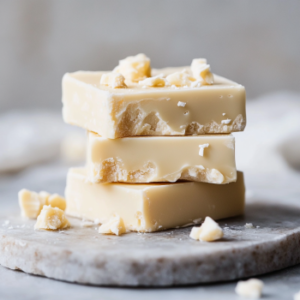
- Perfect Texture: Creamy, smooth, and melts in your mouth.
- Crowd-Pleaser: Great for gifting or sharing at parties.
- Make-Ahead Friendly: Stays fresh for weeks in the fridge.
Ingredients You’ll Need
- 2 cups white chocolate chips – The star of the show, bringing all the creamy, dreamy vibes.
- 1 (14-ounce) can sweetened condensed milk – The secret to that luscious texture.
- 1 tsp vanilla extract – Adds warmth and depth to the flavor.
- ¼ tsp salt – Balances the sweetness perfectly.
- Optional: ½ cup chopped nuts, dried fruit, or sprinkles – For a fun, personalized twist.
Kitchen Equipment You’ll Need
- 8×8-inch baking dish – For setting your fudge.
- Saucepan – To melt everything into creamy goodness.
- Mixing bowl – Optional, if you’re adding mix-ins.
- Spatula – To spread the fudge evenly.
- Parchment paper – Makes removing the fudge a breeze.
- Measuring cups and spoons – For precise portions.
How to Make White Chocolate Fudge
Step 1: Prepare Your Baking Dish
Line an 8×8-inch baking dish with parchment paper, leaving some overhang on the sides. This makes it super easy to lift the fudge out once it’s set.
Step 2: Melt the White Chocolate
In a medium saucepan, combine the white chocolate chips and sweetened condensed milk. Place the pan over medium heat and stir continuously until the chocolate is completely melted and the mixture is silky smooth.
Pro Tip: Keep the heat low and steady to avoid scorching the chocolate.
Step 3: Add the Flavorings
Remove the saucepan from the heat. Stir in the vanilla extract and salt until everything is well combined.
Step 4: Customize with Add-Ins (Optional)
If you’re feeling fancy, now’s the time to fold in your add-ins—think chopped nuts, dried cranberries, crushed cookies, or colorful sprinkles. Go wild or keep it simple—it’s totally up to you!
Step 5: Pour and Spread
Pour the fudge mixture into your prepared baking dish. Use a spatula to spread it out evenly, smoothing the top as much as possible.
Step 6: Chill Until Firm
Pop the dish into the refrigerator and let the fudge chill for at least 2 hours, or until it’s completely firm.
Step 7: Cut and Serve
Once the fudge is set, lift it out of the baking dish using the parchment paper overhang. Place it on a cutting board and slice it into small squares. Serve and enjoy!
Pro Tip: For clean, sharp edges, wipe your knife with a damp cloth between cuts.
Tips for Perfect White Chocolate Fudge
- Use Quality Chocolate: The better the chocolate, the better the fudge. Splurge on high-quality white chocolate chips for the best flavor and texture.
- Don’t Skip the Salt: It might seem like a tiny amount, but the salt is key to balancing the sweetness.
- Chill Time is Key: Be patient and let the fudge set completely before cutting—it’ll be worth the wait!
- Add a Pop of Color: Sprinkles or crushed peppermint candies make this fudge extra festive for the holidays.
Flavor Variations
- Holiday Peppermint: Add crushed candy canes for a festive twist.
- Nutty Delight: Fold in chopped pecans, almonds, or pistachios for a bit of crunch.
- Berry Bliss: Toss in dried cranberries or cherries for a fruity burst of flavor.
- Cookies and Cream: Mix in crushed chocolate sandwich cookies for a fun, kid-friendly option.
- Salted Caramel Swirl: Drizzle caramel sauce over the top before chilling and sprinkle with flaky sea salt.
Storage Tips
- Refrigerator: Store your fudge in an airtight container in the fridge for up to 2 weeks.
- Freezer: For longer storage, wrap the fudge tightly in plastic wrap and freeze for up to 3 months. Thaw in the fridge before serving.
FAQs
Q: Can I use a different kind of chocolate?
Yes! You can swap white chocolate for milk or dark chocolate if you prefer. Just note that the flavor will change accordingly.
Q: What if my fudge doesn’t set?
If your fudge is too soft, it may need more time to chill. If it’s still not firm, it’s possible the chocolate wasn’t fully melted or the mixture wasn’t combined well.
Q: Can I double the recipe?
Absolutely! Just use a 9×13-inch pan instead of an 8×8-inch one, and you’re good to go.
Q: Is this fudge overly sweet?
Nope! Thanks to the salt and vanilla, this fudge strikes the perfect balance of creamy and sweet without being cloying.
Final Thoughts
White Chocolate Fudge is one of those recipes that feels fancy but is secretly so simple to make. It’s smooth, creamy, and endlessly customizable, making it perfect for holidays, parties, or just a little everyday indulgence.
Whether you’re adding your favorite mix-ins or keeping it classic, this fudge is guaranteed to impress. So go ahead, whip up a batch (or two!), and enjoy every dreamy bite.
If you give this recipe a try, I’d love to hear how it turned out! Did you add any fun mix-ins? Let’s chat in the comments or over on social media.
Happy fudge-making! 🍫✨