Strawberry Cheesecake Buns
Jump to Recipe
Strawberry Cheesecake Buns: Sweet, Fluffy, and Oh-So-Good!
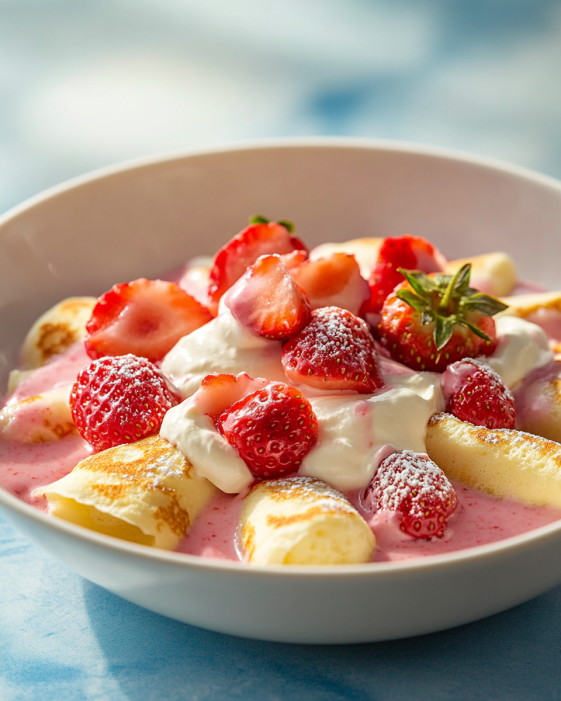
These Strawberry Cheesecake Buns are the ultimate treat when you’re craving something sweet, soft, and bursting with flavor. Whether you’re planning a cozy weekend breakfast or a show-stopping dessert, these buns deliver. With pillowy dough, creamy cheesecake filling, and juicy strawberries, they’re like little pockets of happiness straight out of your oven.
The best part? They’re easier to make than you’d think! From the sweet aroma of fresh-baked buns wafting through your kitchen to that first irresistible bite, this recipe is all about creating moments of joy. Let’s bake something magical together!
Why You’ll Love These Strawberry Cheesecake Buns
- Perfect for Any Occasion: These buns work for breakfast, brunch, dessert, or even a midday snack.
- Family Favorite: The combination of strawberries and cheesecake is a guaranteed crowd-pleaser.
- Beginner-Friendly: Don’t let the impressive look fool you—this recipe is simple enough for anyone to follow.
- Customizable: Swap out the strawberries, add a twist of lemon, or drizzle with icing—these buns are your blank canvas!
- Make-Ahead Magic: Prep the dough and filling ahead of time for an easy baking day.
Ingredients You’ll Need
For the Dough:
- 3 cups (375g) all-purpose flour – The base for that soft, fluffy texture.
- 2 ¼ tsp active dry yeast – Helps the dough rise beautifully.
- ¼ cup (50g) sugar – Adds just the right amount of sweetness.
- ½ tsp salt – Balances the flavors.
- ¾ cup (180ml) warm milk – Activates the yeast and keeps the dough moist.
- ¼ cup (60g) melted butter – For richness and flavor.
- 1 large egg – Binds the dough and adds structure.
For the Cheesecake Filling:
- 8 oz (225g) cream cheese, softened – The creamy heart of the filling.
- ¼ cup (60g) sour cream – Adds tangy richness.
- ⅓ cup (65g) sugar – Sweetens the filling.
- 1 tsp vanilla extract – Enhances the flavors.
- 1 cup fresh strawberries, diced – The star of the show!
Tools You’ll Need
- Large mixing bowl
- Stand mixer or hand mixer
- Rolling pin
- Baking sheet
- Parchment paper or silicone baking mat
- Small spoon or spatula
How to Make Strawberry Cheesecake Buns
Step 1: Prepare the Dough
- In a large bowl, combine warm milk and yeast. Let it sit for 5 minutes until frothy.
- Stir in sugar, salt, melted butter, and egg. Gradually add the flour, mixing until a soft dough forms.
- Turn the dough out onto a floured surface and knead for about 8 minutes, or until smooth and elastic.
- Place the dough in a greased bowl, cover with a clean kitchen towel, and let it rise in a warm spot for 1 hour, or until doubled in size.
Step 2: Make the Cheesecake Filling
- While the dough rises, beat the softened cream cheese, sour cream, sugar, and vanilla extract until smooth.
- Gently fold in the diced strawberries. The filling should be creamy with pops of fresh fruit.
Step 3: Shape the Buns
- Once the dough has risen, roll it out on a floured surface to about ½-inch thickness.
- Cut the dough into squares (about 3×3 inches).
- Place a spoonful of the cheesecake filling in the center of each square. Fold the corners up and pinch them together to seal, forming a little pouch.
Step 4: Let the Buns Rise Again
- Arrange the buns on a parchment-lined baking sheet, leaving space between them.
- Cover with a towel and let them rise for another 30 minutes. This second rise ensures soft, fluffy buns.
Step 5: Bake the Buns
- Preheat your oven to 375°F (190°C).
- Bake the buns for 20–22 minutes, or until golden brown. The tops should be lightly crisp, while the insides stay soft and creamy.
- Let the buns cool slightly before serving—if you can wait that long!
Tips for Success
- Warm, Not Hot Milk: Too-hot milk can kill the yeast, so aim for a temperature just above lukewarm.
- Fresh Yeast is Key: Check the expiration date to ensure your yeast is active.
- Don’t Overfill: A heaping spoonful of filling is plenty—too much can cause the buns to burst.
- Seal the Edges Well: Pinch the dough tightly to keep the filling from leaking out during baking.
- Experiment with Flavors: Add a touch of lemon zest to the filling for extra brightness.
Flavor Variations
- Berry Medley: Swap strawberries for blueberries, raspberries, or a mix of your favorites.
- Tropical Twist: Add diced mango or pineapple to the filling for a sunny vibe.
- Chocolate Lovers: Drizzle the buns with melted chocolate after baking.
- Nutty Crunch: Sprinkle chopped almonds or pecans on top before baking.
- Vegan Option: Use plant-based cream cheese, almond milk, and vegan butter for a dairy-free version.
Serving Suggestions
- Breakfast Bliss: Pair with a hot cup of coffee or tea for a cozy morning treat.
- Dessert Delight: Serve warm with a scoop of vanilla ice cream or a dollop of whipped cream.
- Brunch Star: Add these buns to your brunch spread alongside fresh fruit and mimosas.
- Snack Time: Enjoy them on their own for a sweet pick-me-up any time of day.
Storage and Make-Ahead Tips
- Room Temperature: Store leftover buns in an airtight container for up to 2 days.
- Freeze for Later: Wrap cooled buns individually and freeze for up to 3 months. Thaw overnight and reheat in the oven.
- Make the Dough Ahead: Prepare the dough the night before and let it rise in the fridge. Bring to room temperature before shaping.
FAQs
Q: Can I use frozen strawberries?
- Yes! Just thaw and drain them well before adding to the filling.
Q: What if my dough doesn’t rise?
- Check your yeast and milk temperature. If the yeast isn’t frothy, it may be inactive.
Q: Can I make mini buns?
- Absolutely! Cut smaller squares of dough and use less filling for bite-sized treats.
Q: How do I prevent the buns from sticking?
- Line your baking sheet with parchment paper or use a silicone baking mat.
Q: Can I add a glaze?
- Yes! A simple powdered sugar glaze or cream cheese frosting takes these buns to the next level.
Final Thoughts
There’s something magical about baking Strawberry Cheesecake Buns. From the soft, golden dough to the creamy, fruity filling, every bite feels like a little celebration. Whether you’re sharing them with loved ones or treating yourself, these buns are the perfect way to make any day extra special.
So, roll up your sleeves, preheat your oven, and get ready to fill your home with the sweet smell of success. Trust me—these buns are worth every moment! 🍓✨


