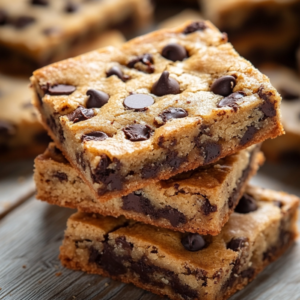
Peanut Butter Chocolate Chip Bars: The Ultimate Comfort Dessert!
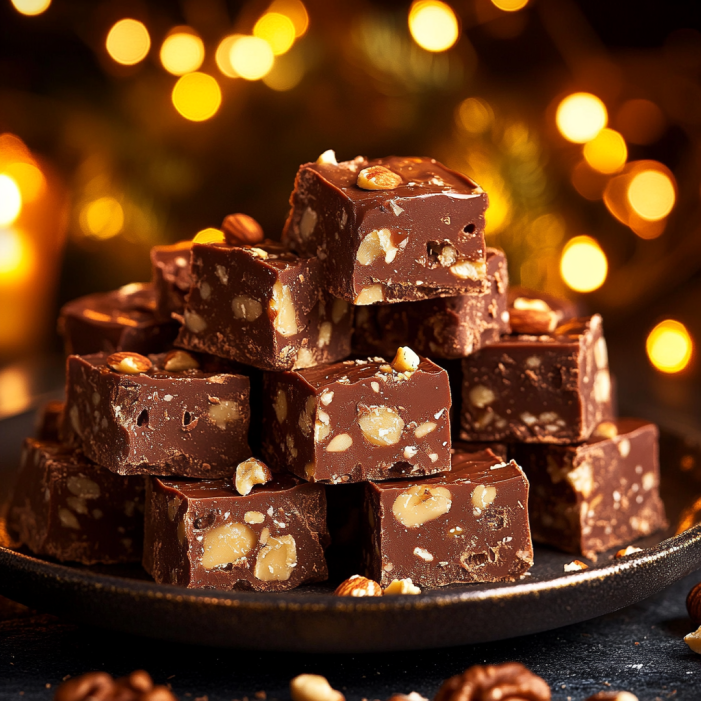
When it comes to desserts, few combos are as iconic as peanut butter and chocolate. These Peanut Butter Chocolate Chip Bars are soft, chewy, and packed with rich, nutty flavor and melty chocolate chips. They’re the kind of treat that feels like a warm hug—simple, nostalgic, and absolutely irresistible.
Whether you’re baking for a potluck, a cozy night in, or just because you’re craving something sweet, these bars are a guaranteed hit. Plus, they come together in one bowl (yes, ONE bowl) with pantry staples, so cleanup is a breeze. Let’s get baking!
Why You’ll Love This Recipe
- One-Bowl Wonder: Minimal dishes, maximum flavor.
- No Mixer Needed: Just a whisk, a spatula, and a little arm power.
- Perfectly Chewy: Soft, gooey, and loaded with chocolate chips in every bite.
- Customizable: Add nuts, swap the chocolate chips, or sprinkle with sea salt—make them your own.
- Crowd-Pleaser: Great for parties, bake sales, or just treating yourself (no judgment).
Ingredients You’ll Need
- ½ cup creamy peanut butter – The star of the show. Smooth and dreamy.
- ¼ cup unsalted butter, melted – Adds richness and helps with that chewy texture.
- ½ cup brown sugar – For a hint of molasses and extra chewiness.
- ¼ cup granulated sugar – Balances the sweetness.
- 2 large eggs – Binds everything together and adds moisture.
- 1 tsp vanilla extract – Because vanilla makes everything better.
- 1 cup all-purpose flour – The base of the bars.
- 1 tsp baking powder – Gives them a little lift.
- ¼ tsp salt – Enhances all the flavors.
- 1 cup chocolate chips – Semi-sweet or milk chocolate, your choice!
How to Make Peanut Butter Chocolate Chip Bars
Step 1: Prep Your Pan
Preheat your oven to 350°F (175°C). Grease or line an 8×8 or 9×9-inch baking pan with parchment paper, leaving some overhang for easy removal.
Step 2: Mix the Wet Ingredients
In a large bowl, whisk together the peanut butter, melted butter, brown sugar, and granulated sugar until smooth and creamy. Add the eggs and vanilla extract, and mix until fully combined.
Step 3: Add the Dry Ingredients
Stir in the flour, baking powder, and salt until just combined. Be careful not to overmix—this keeps the bars tender and chewy.
Step 4: Fold in the Chocolate Chips
Gently fold in the chocolate chips, ensuring they’re evenly distributed throughout the batter.
Step 5: Bake to Perfection
Pour the batter into your prepared baking pan and smooth the top with a spatula. Bake for 25–30 minutes, or until the top is golden and a toothpick inserted into the center comes out with just a few moist crumbs.
Step 6: Cool and Slice
Let the bars cool completely in the pan before slicing into squares. For the cleanest cuts, chill them in the fridge first.
Tips for Success
- Don’t Overbake: The key to chewy bars is pulling them out when the center is just set—they’ll firm up as they cool.
- Use Good-Quality Peanut Butter: A creamy, processed peanut butter like Jif or Skippy works best for this recipe. Natural peanut butter can make the bars too oily or dry.
- Customize the Chocolate: Swap semi-sweet chips for milk chocolate, dark chocolate, or even peanut butter chips for extra peanut butter goodness.
Fun Variations to Try
- Add Crunch: Stir in chopped peanuts, walnuts, or pecans for texture.
- Sprinkle Sea Salt: A pinch of flaky sea salt on top before baking takes these bars to the next level.
- Gluten-Free Option: Use a 1:1 gluten-free flour blend to make these bars celiac-friendly.
- Chunky Peanut Butter: Adds a little extra texture and crunch.
- Oatmeal Twist: Replace ½ cup of the flour with old-fashioned oats for a heartier bar.
Storage Tips
- Room Temperature: Store in an airtight container for up to 4 days.
- Refrigeration: Keep in the fridge for up to 1 week for the freshest texture.
- Freezing: Wrap individual bars tightly in plastic wrap and freeze in a zip-top bag for up to 2 months. Thaw at room temperature or microwave for 10–15 seconds for a warm, gooey treat.
FAQs
Q: Can I use natural peanut butter?
Yes, but make sure it’s well-stirred and not too oily. The bars may have a slightly different texture.
Q: Can I make these dairy-free?
Absolutely! Use a dairy-free butter substitute and dairy-free chocolate chips.
Q: How do I know when they’re done?
The edges should be golden, and a toothpick inserted in the center should come out with a few moist crumbs—not wet batter.
Q: Can I double the recipe?
Yes! Use a 9×13-inch pan and increase the baking time to 35–40 minutes.
Q: Are these bars chewy or cakey?
They’re perfectly chewy with a soft, slightly gooey center.
Q: What’s the best way to cut them cleanly?
Let the bars cool completely, then use a sharp knife, wiping it clean between slices.
Q: Can I make these egg-free?
Try using flax eggs or an egg replacer, though the texture may vary slightly.
Q: Do these need to be refrigerated?
Not necessarily, but storing them in the fridge can help them stay fresher longer.
Final Thoughts
Peanut Butter Chocolate Chip Bars are the dessert equivalent of comfort food—soft, chewy, and bursting with rich peanut butter and chocolate flavor. Whether you’re baking for a crowd or just treating yourself, these bars are sure to become a go-to recipe in your kitchen.
Have fun customizing them to suit your taste, and don’t forget to share your creations! Tag me on social media or leave a comment below—I’d love to see how they turn out.
Happy baking! 🍫🥜✨