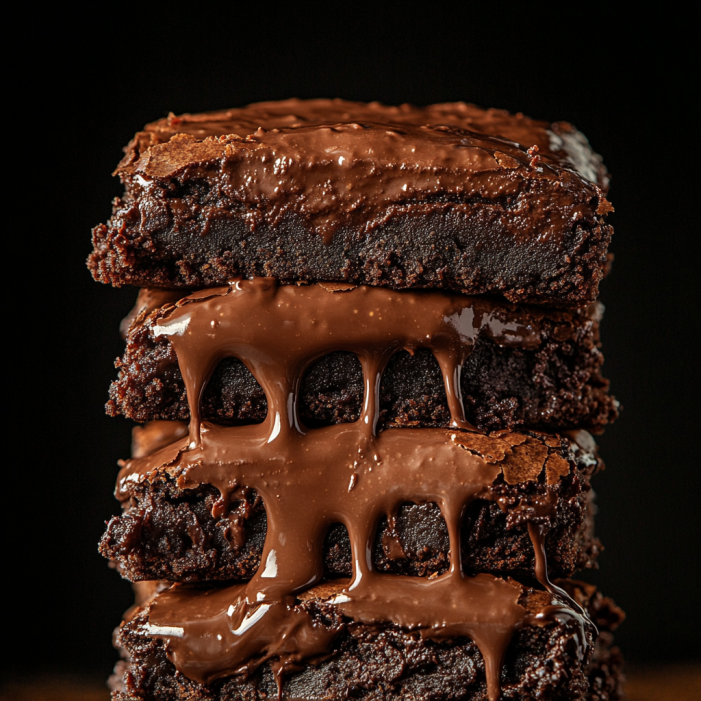
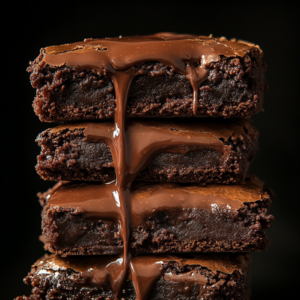
Easiest Fudgy Chocolate Brownies
Get ready to elevate your baking game with these Easiest Fudgy Chocolate Brownies! Picture this: it’s a rainy Sunday, and your kid has just invited the entire soccer team over after their game. You’ve got half an hour to whip up something that’ll impress a bunch of teenagers with discerning tastes. Enter this simple brownie recipe that promises to deliver quick, chocolatey goodness.
When I pulled that tray out of the oven, the irresistible aroma of chocolate wafted through the house, drawing kids into my kitchen before I could even check if they were done. The first bite was pure magic—the crisp, crackling surface giving way to a gooey middle filled with melted chocolate bits. It was a moment that stopped conversations and turned those kids into brownie enthusiasts. Since then, these brownies have become my go-to treat for everything from school fundraisers to family gatherings. Now, I’m excited to share my secret with you!
What Makes These Brownies Great
- One Bowl Wonder: This recipe truly requires just one bowl from start to finish—no messy measuring tools cluttering your kitchen!
- Ultra Fast: You can go from gathering ingredients to baking in under 10 minutes, satisfying those chocolate cravings before they drive you crazy.
- Amazing Texture Combo: Enjoy the perfect mix of a shiny, crackly crust and a dense, fudgy interior that makes you close your eyes with every bite.
- Basic Kitchen Staples: No fancy gadgets or hard-to-find ingredients here—just everyday pantry items and a mixing bowl.
I once shared these brownies at a neighbor’s get-together, and her husband texted me at midnight asking if there were any leftovers he could “steal.” I wasn’t sure if he was joking about jumping the fence to raid my kitchen! These brownies have that effect on people.
Key Ingredient Magic
- Cocoa Powder (Unsweetened): The backbone of our chocolate flavor. Dutch-processed cocoa gives a deeper color and smoother taste, but regular works just fine. Just make sure it’s fresh—stale cocoa is a no-go!
- Butter: I prefer unsalted butter so I can control the saltiness, but if you only have salted, just reduce the added salt a bit. Trust me, melted butter is essential for that gooey texture.
- Vegetable Oil: It might seem odd next to butter, but a bit of oil helps create that coveted crackly top. Don’t skip it!
- White and Brown Sugar: You need both! White sugar contributes to the crackly top, while brown sugar adds moisture and richness. This combination is just perfect.
- Eggs: They provide structure and richness. Room temperature eggs mix better, but if you forget, just place them in warm water for about 5 minutes.
- Vanilla Extract: Use real vanilla if you can; it enhances the chocolate flavor beautifully.
- Flour: Just enough to hold everything together without making the brownies cakey. Be precise with your measurements—too much flour can lead to dryness.
- Chocolate Chunks: Choose a chocolate you’d happily eat on its own. I love bittersweet chocolate (around 70% cacao) for its rich flavor, but semisweet works great too. Breaking up a bar instead of using chips creates those amazing melty pockets.
Can’t-Fail Approach
Starting Right:
Preheat your oven to 350°F (175°C) and line an 8×12-inch baking pan with parchment paper, leaving some overhang for easy lifting later. If you prefer thicker brownies, an 8×8-inch pan works too—just bake them a few extra minutes.
Mix It Smart:
In your mixing bowl, combine the melted butter and vegetable oil. Then, whisk in both sugars until well blended. This step is crucial for that crackly top! Next, add the eggs and vanilla, whisking vigorously for about a minute. You’re not just mixing; you’re incorporating air, which is key for the texture.
Add Dry Ingredients Carefully:
Sift the flour, cocoa powder, and salt directly into the wet mixture. This keeps lumps at bay without dirtying another bowl. Use a rubber spatula to gently fold everything together until you can no longer see dry ingredients. Avoid overmixing—too much stirring activates the gluten in the flour, resulting in tough brownies instead of soft ones.
Chocolate Loading:
Stir in about three-quarters of the chocolate chunks, saving some for the top. This two-step approach ensures you get melty chocolate throughout while also showcasing beautiful chocolate pools on top.
Smart Baking:
Pour your brownie batter into the prepared pan and smooth it out. Don’t tap the pan to release air bubbles—we want those for the perfect texture! Sprinkle the reserved chocolate chunks on top, pressing them in slightly.
Watch Your Timing:
Bake for 25-30 minutes if you want that amazing fudgy middle that makes these brownies so special. The center shouldn’t wobble but should look slightly wet. A toothpick inserted should come out with sticky crumbs, not completely clean. Remember, brownies continue to cook from residual heat after you take them out.
Wait for the Win:
This part is the hardest: let the brownies sit in the pan for 15-20 minutes before transferring them to a cooling rack. They need this time to firm up. For neat cuts, wait until they’re completely cool, although I won’t blame you if you sneak a warm piece—just be ready for the delicious mess!
Pro Tips
- Pans Make a Difference: Metal pans conduct heat better than glass. If you’re using glass, lower your oven temperature by 25°F.
- Check with a Toothpick: For fudgy brownies, it should come out with moist crumbs. For cakey brownies, bake until it’s mostly clean.
- Cooling Works Magic: The texture improves as they cool. What seems too gooey fresh out of the oven often sets into perfect fudginess.
- Fridge Trick: For super clean cuts (great for parties), chill the brownies for an hour after they’ve cooled completely, then cut with a sharp knife, cleaning it between slices.
- Flour Trick: Always fluff your flour with a spoon before spooning it into your measuring cup and leveling it off. Scooping straight from the bag can pack the flour and add up to 25% more than you need.
My daughter’s friend Madison, who claims to be a “brownie expert” at 13, gave these her highest score ever and asked for them instead of cake for her birthday. That’s the ultimate compliment!
Tasty Companions
Transform these brownies into a fancy dessert by serving warm squares with a scoop of real vanilla ice cream and a drizzle of salty caramel sauce. The combination of warm brownie and cold ice cream is simply divine! I love to bring this out when I want to impress dinner guests without spending all day in the kitchen.
For parties, set up a fun sundae bar with cut-up brownies alongside ice cream, whipped cream, nuts, fresh berries, and various sauces. Everyone loves building their own treats, and this setup always sparks conversation. It’s saved more than one awkward party at my house!
For a quick afternoon pick-me-up, enjoy a small brownie with a strong cup of coffee or espresso. The bitter coffee perfectly balances the rich chocolate, making it my go-to 3 PM ritual at least once a week.
Flavor Twists
- Coffee Boost: Add 1 tablespoon of instant espresso powder to the dry ingredients. It won’t make the brownies taste like coffee, but it will enhance the chocolate flavor—my secret for serious chocolate lovers!
- Add Some Crunch: Mix in 1 cup of toasted chopped nuts like walnuts, pecans, or hazelnuts with the chocolate chunks. The contrast between the gooey brownie and crunchy nuts is irresistible. My husband won’t touch brownies without nuts now!
- Holiday Twist: During the Christmas season, swap the vanilla extract for 1/2 teaspoon of peppermint extract and top with crushed candy canes instead of extra chocolate chunks. These festive brownies disappear faster than any cookie at our holiday neighborhood swap!
Keeping Them Fresh
Counter Storage:
Store fully cooled brownies in an airtight container at room temperature for up to 3 days. If stacking, place parchment between layers. The flavor actually improves after a day as the chocolate taste develops.
Refrigerator:
For longer storage, keep them in the fridge for up to a week. The cold makes them firmer, so let them warm up to room temperature before enjoying, or microwave briefly for that just-baked feel.
Freezer Ready:
These brownies freeze beautifully for up to 3 months. Cut them into single pieces, wrap each tightly in plastic, and store them in a freezer bag. This way, you can thaw just what you need when those chocolate cravings hit.
To thaw, unwrap and leave at room temperature for about 2 hours, or microwave for 15-20 seconds for that warm, gooey sensation. Nobody will ever guess they were frozen!
Clever Shortcuts
- Chocolate Choice: The better the chocolate, the better your brownies will taste. You don’t have to splurge—just choose good quality chocolate you enjoy eating on its own.
- Foil Helper: If your brownies are browning too much on top but still need to cook in the middle, lay some aluminum foil loosely on top for the remaining baking time.
- Cutting Secret: Use a plastic knife to cut brownies—it won’t drag through the gooey middle like metal can. It sounds odd, but it really works!
Last Valentine’s Day, I packaged these brownies in small heart-shaped boxes for my daughter’s teachers. One teacher emailed me that night asking for the recipe because her husband had devoured the entire box and she “needed to make more right away.” That’s what a truly perfect brownie does—it makes chocolate lovers forget all about sharing and moderation!
Frequently Asked Questions
→ How do these brownies get their fudgy texture?
Using more fats like butter and oil compared to flour keeps the texture fudgy. Avoid mixing too much after adding the dry ingredients to prevent an airy, cake-like texture.
→ How can I tell if they’re baked enough?
Bake until the middle is set but still slightly soft when you gently shake the pan, around 25-30 minutes. A toothpick should come out with damp crumbs, not dry. Remember, they’ll keep firming up after you pull them out.
→ Is Dutch cocoa powder okay to use?
Absolutely! Both Dutch-processed and natural cocoa powders work beautifully here. Dutch gives a smoother, mellow chocolate taste, while natural is bolder and fruitier.
→ Why should the eggs be at room temperature?
Room-temperature eggs mix better and help achieve that shiny crackly top. Cold eggs can cause the melted butter to clump, ruining the texture.
→ Can I make a bigger batch?
You bet! Double the ingredients and use a 9×13-inch pan. Extend the cooking time to 35-40 minutes. Check doneness with the jiggle test—the center should be soft but not fully set.
Ingredients
Main Ingredients:
- ¾ teaspoon salt
- 1 cup unsalted butter, melted and slightly cooled
- 4 large eggs (room temperature preferred)
- 1¼ cups granulated sugar
- 1 cup packed light brown sugar
- 1 tablespoon pure vanilla extract
- 2 tablespoons vegetable oil
- 1 cup unsweetened cocoa powder (good quality)
- 1 cup all-purpose flour
- 7 oz large chocolate chunks or chips, roughly chopped
Optional Add-ins:
- Chopped nuts (walnuts, pecans, peanuts, almonds, etc.)
- More chocolate chips (dark, milk, or white), peanut butter chips
- Unsweetened or sweetened shredded coconut
- Dried fruits (raisins, cranberries, etc.)
Instructions
- Preheat the Oven:
Set your oven to 350°F (175°C). Grease an 8×12-inch baking pan with cooking spray, then line it with parchment paper, leaving some overhang for easy removal. - Mix Wet Ingredients:
In a medium bowl, combine the melted butter, vegetable oil, and both sugars. Whisk until everything is well mixed. Add the eggs and vanilla, whisking for about a minute until the mixture looks lighter. - Add Dry Ingredients:
Using a sifter, add the flour, cocoa powder, and salt into the wet mixture. Gently fold the dry ingredients in—don’t overmix, or the brownies might turn out more like cake than fudgy goodness. - Incorporate Chocolate:
Mix about three-quarters of the chopped chocolate into the batter, ensuring it’s evenly distributed. - Pour and Top:
Pour the brownie batter into your prepared pan, smoothing out the surface. Sprinkle the remaining chocolate on top. - Bake:
Bake for 25-30 minutes for gooey brownies or up to 35-40 minutes for firmer ones. Remember, brownies continue to set in the hot pan even after you take them out. A toothpick should come out with a few damp crumbs for gooier brownies. - Cool and Cut:
Let the brownies sit for 15-20 minutes, then carefully lift them out using the parchment paper. Allow them to cool to room temperature before slicing into 16 squares. They’ll keep firming up as they cool.
Notes
- Prefer thick brownies? Use a 7×11-inch pan and bake for 40-45 minutes. For thinner brownies, opt for a 9×13-inch pan and bake about 18-20 minutes.
- Once you add the flour and cocoa powder, stop mixing. Too much stirring traps air, leading to cake-like brownies.
- Oven placement matters! Use the top shelf for more even baking, as the middle shelf might overcook them and dry them out.
- Store brownies for up to 3 days at room temperature, 5 days in the fridge, or 3 months in the freezer. For frozen brownies, let them thaw in the fridge overnight, then allow them to reach room temperature before enjoying. You can also warm them up briefly in the microwave.
Tools You’ll Need
- 8×12-inch baking pan
- Parchment or baking paper
- Medium mixing bowl
- Whisk
- Sifter or fine mesh strainer
- Rubber spatula
Allergy Information
Please check all ingredients for potential allergens and consult a health professional if in doubt.
Nutrition Facts (Per Serving)
This information is approximate and should not be used as definitive health advice.
With these brownies in your baking repertoire, you’re guaranteed to impress friends and family alike! Enjoy every fudgy bite! 🍫✨